How to Measure Surface Resistance
Measuring ESD controls in a production process is obviously important to your product’s quality. Why would you take the time to do ESD audits to protect your product throughout production and not your packaging materials? If you’re not quite sure how to measure your packaging materials read on because we’ll help you with making a surface resistance measurement using current industry guidelines! A surface resistance measurement will let you know if your packaging materials are static dissipative, which, is the ideal surface resistance for making direct contact with ESD sensitive devices. All it takes is a few easy steps to make a proper measurement! What would you be measuring with a surface resistance test? Here is a list of some of the things you can measure:
•Bags
•Wraps
•Corrugated
•Conductive Black film
•Static shielding film
•Pink or Blue poly film
•Tote boxes
•Plastic samples
Before starting gather up all the materials you will require. You’re going to need:
• A wide range resistance instrument such as a Prostat PRS-801, PRS-812, or PAS-853
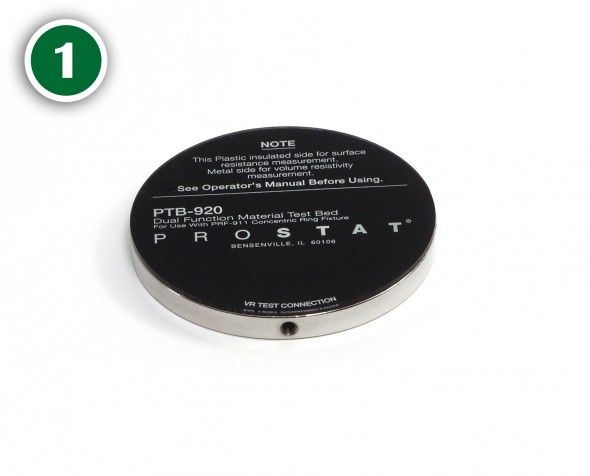
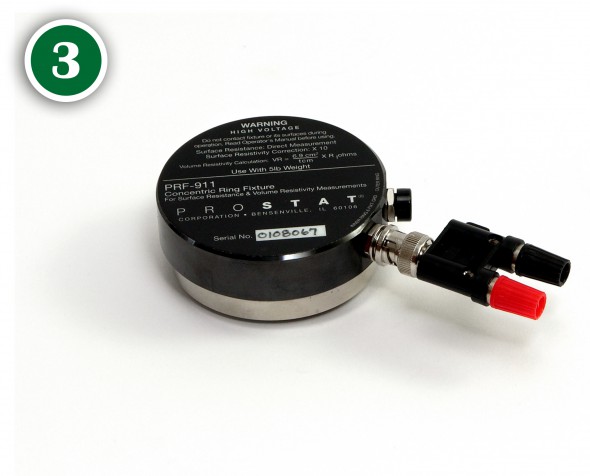
• PRF-911 Concentric Ring Set (includes PTB-920 dual test bed, and dual banana jack adapter)
• PRS-801-W 5 lb. Conductive Rubber Electrode
• Black lead, or a high resistance wiring set that includes a shielded lead with green banana connector
• Red lead
After you have gathered the materials you need, place the PTB-920 dual test bed that comes in the PRF-911 Concentric Ring Set and set it on a flat surface with the insulated side (black side) up. If you do not measure materials on an insulated surface you may get false readings for the items you are testing.
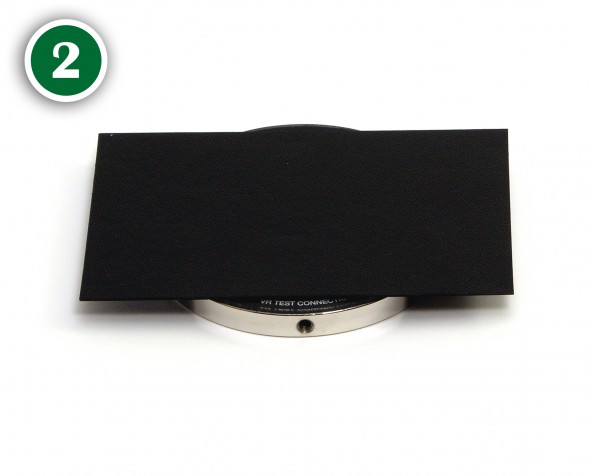
Now that you have set up the test bed, prepare your material for testing. When measuring packaging materials you will want to use a 3.5” x 5.5” sample size of the product you wish to measure. Once you have cut the sample to size, place it on the PTB-920 dual test bed with the surface being measured facing up.
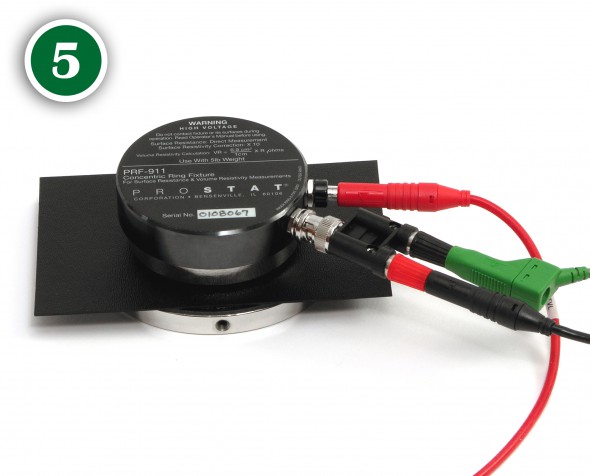
With the sample cut and on the test bed ready to be measured, remove the red cap on the PRF-911 Concentrate Ring and insert the BNC adapter onto the bayonet fitting located on the side of the concentric ring.
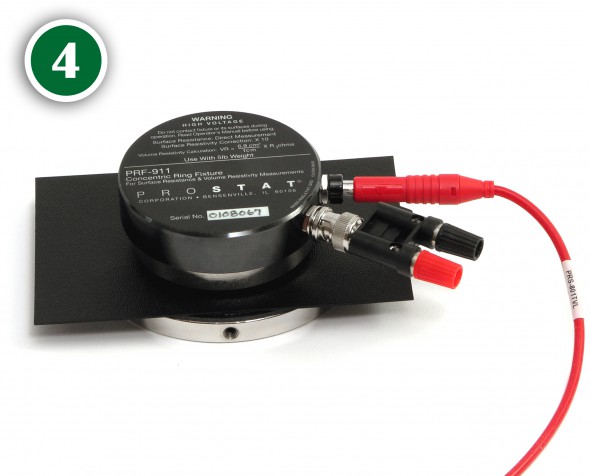
Now place the concentric ring on top of the sample. Be sure to center the fixture on the sample end to end, and side to side. Then, connect your red positive (+) test lead to the “outer ring electrode” receptacle located on the side of the fixture. This is not a part of the adapter you just attached to the unit.
Once you have connected the red positive (+) test lead, connect the black negative (-) test lead into the red banana jack of the BNC adapter. Remember to go black (-) to red (+) and red (+) to black for this measurement. After you have connected your black lead you will want to connect the green banana plug if you are using a shielded wiring set. Your green shield plug is connected into the black banana jack of the BNC adapter.
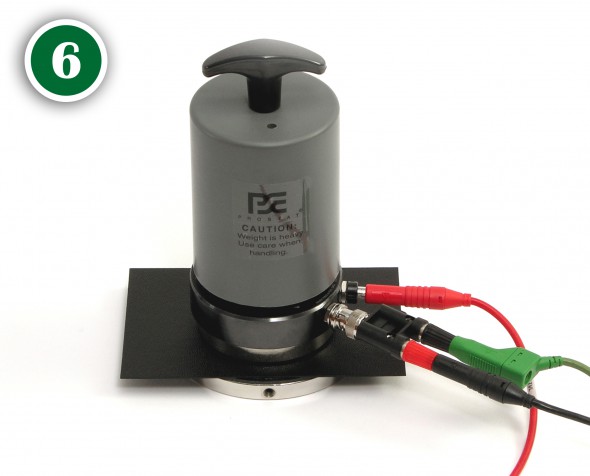
Once you have connected your leads and placed the concentric ring on top of the sample you are measuring, you can place the PRS-801-W 5 lb. Conductive Rubber Electrode on top of the fixture. If you do not place the electrode on top of the concentric ring you are not going to get an in spec reading. The five pound electrode depresses the spring loaded fixture to make positive contact with the test sample being measured. Without the electrode this will not happen and you would get a bad measurement.
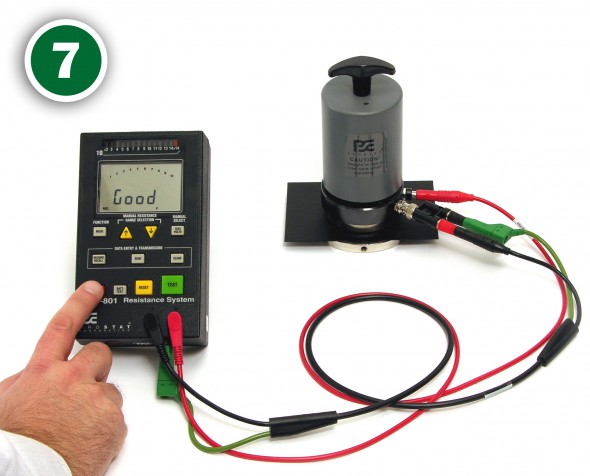
Now you will want to have your PRS-801, PRS-812, or PAS-853 ready to measure. Connect the rest test lead to the positive (+) instrument terminal, and the black test lead to the negative (-) terminal. In this example we are using a PRS-801 Resistance System with a shielded wiring set. Connect the green shield to the instrument’s ground reference. Slide the main power ON/OFF switch to the ON position. Once you have done that you can press the red ON/OFF button to turn the meter ON. Always make sure your leads are connected correctly:
- Red (+) lead to black receptacle on the side of the fixture and to the instrument’s positive (+) terminal
- Black (-) lead to the red receptacle on the dual adapter plug and to the instrument’s negative (-) terminal
- Green shield plug is connected to black receptacle on the dual adapter plug and to the instrument’s ground reference located below the black and red leads
If your leads are not set up correctly you will get an out of spec reading. If you see a reading of >1.0 x 10¹¹ ohm you might have your leads connected wrong.
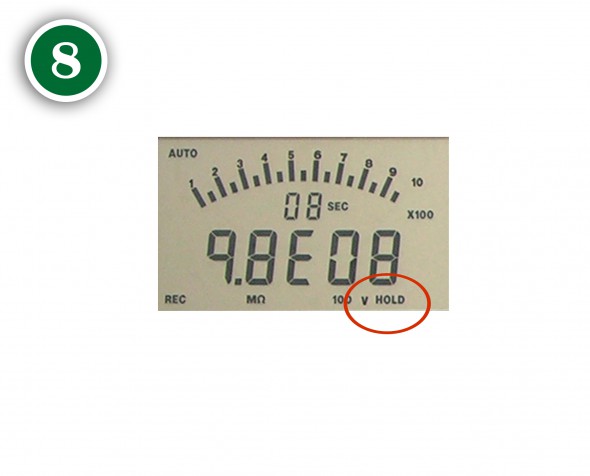
If your leads are connected properly and you have the electrode on the concentric ring, press the green test button on the unit. When “HOLD” is displayed on the screen your measurement has been completed. The acceptable measurement range for static dissipative packaging materials is 1.0 x 10⁶ to less than 1.0 x 10¹¹ ohms. Anything less than 1.0 x 10⁶ means your packaging is conductive. And a measurement equal to or greater than 1.0 x 10¹¹ means your packaging is insulative.
If your measurement seems off you will want to troubleshoot your equipment and connections. If your equipment is fine then your packaging materials may not be as ESD friendly as you thought. This could have an impact on the product you are selling or manufacturing for another company. This surface resistance measurement was conducted as described in ANSI/ESD STM11.11 Standard Test Method for Surface Resistance Measurement of Static Dissipative Planar Materials, available from the ESD Association, Rome, NY (www.esda.org).
Recent Comments